Installing Oracle Database on macOS
Discover how to easily set up Oracle Database on your Mac using Docker containers. This step-by-step guide walks you through the installation process, from Docker setup to database configuration, and shows you how to connect using VS Code.

Installing Oracle Database on macOS: A Simple Guide Using Docker
Oracle Database installation on macOS can be challenging since there’s no native installer. However, Docker makes this process straightforward by running the database in a container. This guide will walk you through installing Oracle Database using Docker and connecting to it through Visual Studio Code.
Before You Begin
Your Mac needs to meet these basic requirements:
- macOS 10.15 or newer
- At least 4 GB RAM available for Docker (Oracle Database needs significant resources)
- An Oracle account for accessing their container registry
- Docker Desktop installed on your system
Installing Docker Desktop
Getting Docker set up is your first step:
- Download Docker Desktop from the official Docker website
- Install it like any other Mac application
- Start Docker Desktop and wait for it to initialize
- Verify the installation by opening Terminal and running:
bash
docker --version
Setting Up Oracle Container Registry Access
Oracle keeps their Docker images in a private registry. Here’s how to get access:
- Visit the Oracle Container Registry website
- Create an account using your email
- Find and accept the license agreement for the database/free repository
- Open Terminal and log in to the registry:
When prompted, use your Oracle account email and passwordbash
docker login container-registry.oracle.com
Installing Oracle Database
Now let’s get Oracle Database running:
-
Download the Oracle Database Express Edition (XE) image:
bashdocker pull container-registry.oracle.com/database/free:latest -
Start the database container:
bashdocker run -d --name oracle-db -p 1521:1521 container-registry.oracle.com/database/free:latest -
Watch the database initialization (this takes a few minutes):
bashdocker logs -f oracle-db -
When you see “DATABASE IS READY TO USE!”, set up the system passwords:
Replace “your-password-here” with a secure password you’ll rememberbashdocker exec oracle-db ./setPassword.sh your-password-here
Connecting Through Visual Studio Code
Let’s set up VS Code to work with your new database:
-
Open VS Code and install the “Oracle Developer Tools for VS Code” extension
-
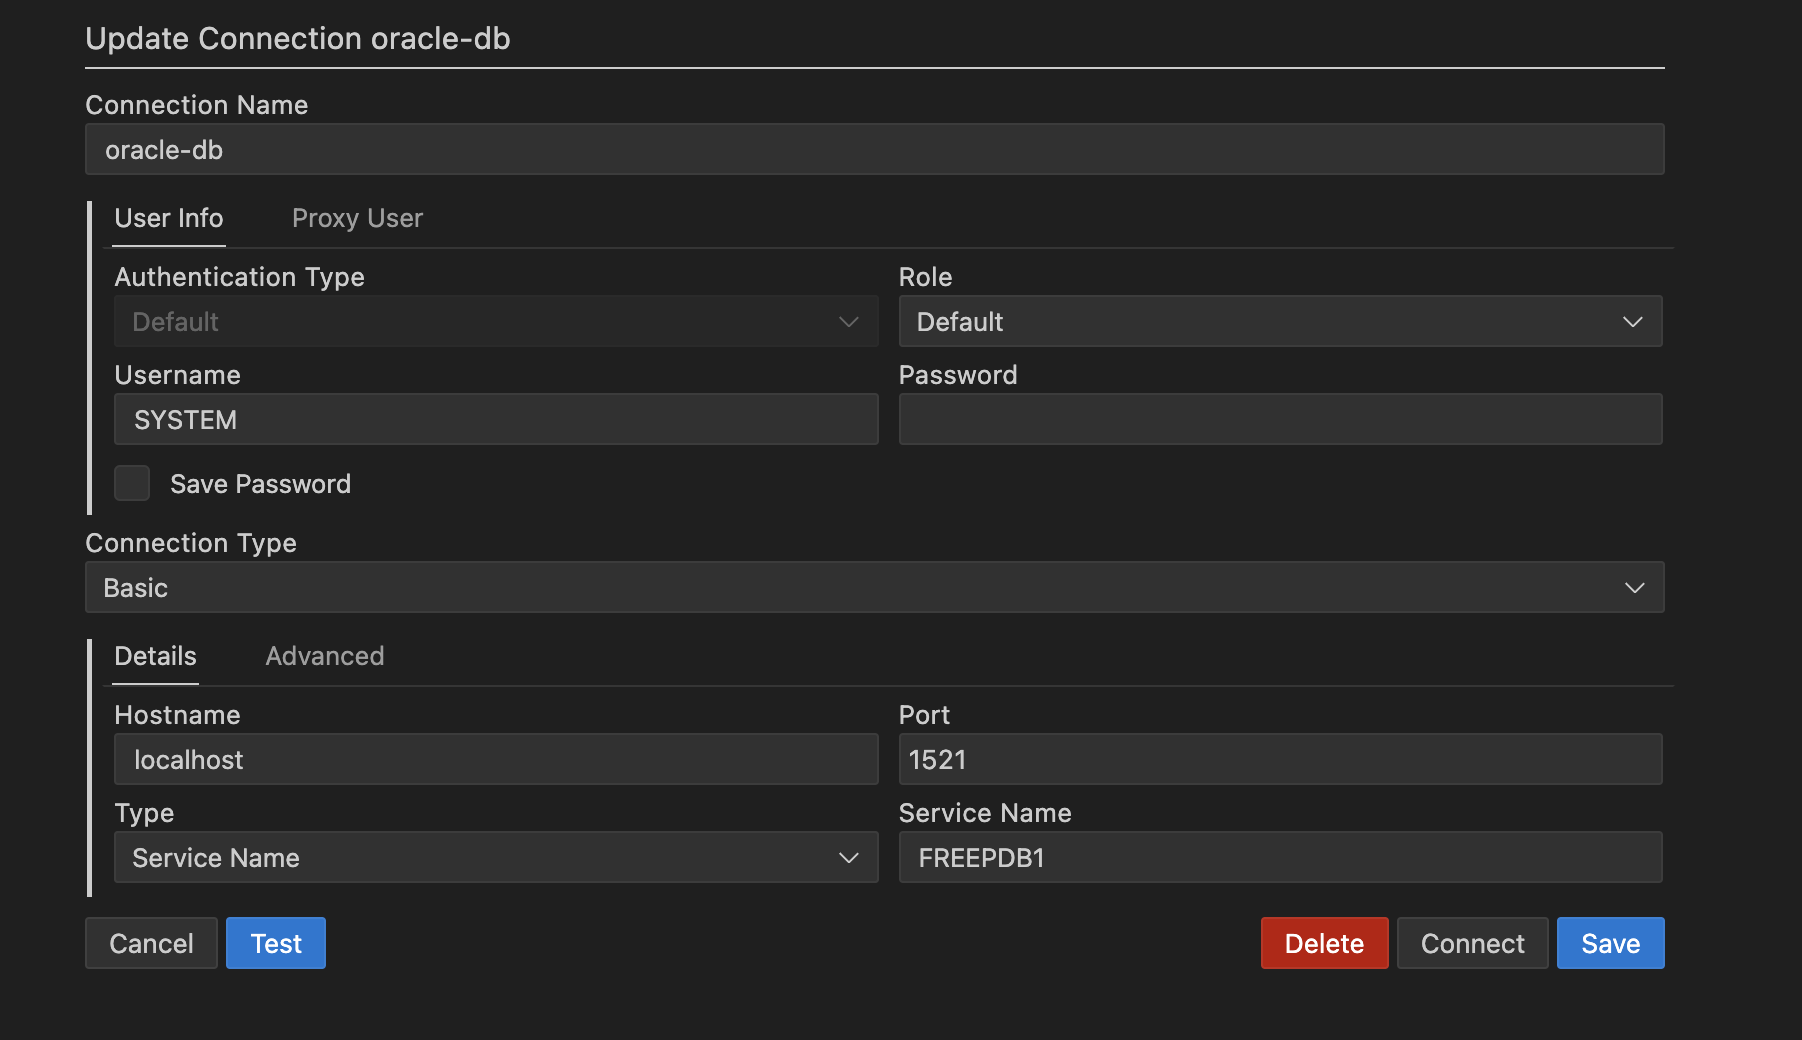
Set up your database connection:
- Click the database icon in the sidebar
- Select “+ New Connection”
- Fill in these details:
- Connection Type: Basic
- Host: localhost
- Port: 1521
- Service Name: FREEPDB1
- Username: SYSTEM
- Password: (the password you set earlier)
-
Click “Test Connection” to make sure everything works
Common Problems and Solutions
If something’s not working, check these common issues:
Database Won’t Start
- Make sure Docker has enough memory (at least 4 GB)
- Check the logs with
docker logs oracle-db
Can’t Connect
- Verify the container is running:
docker ps - Make sure nothing else is using port 1521
- Double-check your password and service name
Password Issues
You can always reset the password:
docker exec oracle-db ./setPassword.sh new-passwordDaily Usage Tips
- Start the database:
docker start oracle-db - Stop the database:
docker stop oracle-db - Check database status:
docker ps
What’s Next?
With Oracle Database running on your Mac, you can:
- Create and manage databases
- Write and test SQL queries
- Connect your applications to the database
- Practice database administration
Remember that this setup is perfect for development and testing, but for production use, you’ll want to look into Oracle’s enterprise offerings and proper data persistence strategies.
Happy database development! 🎉